Cut Your ECS Costs: A Guide to Using a NAT Instance over NAT Gateway
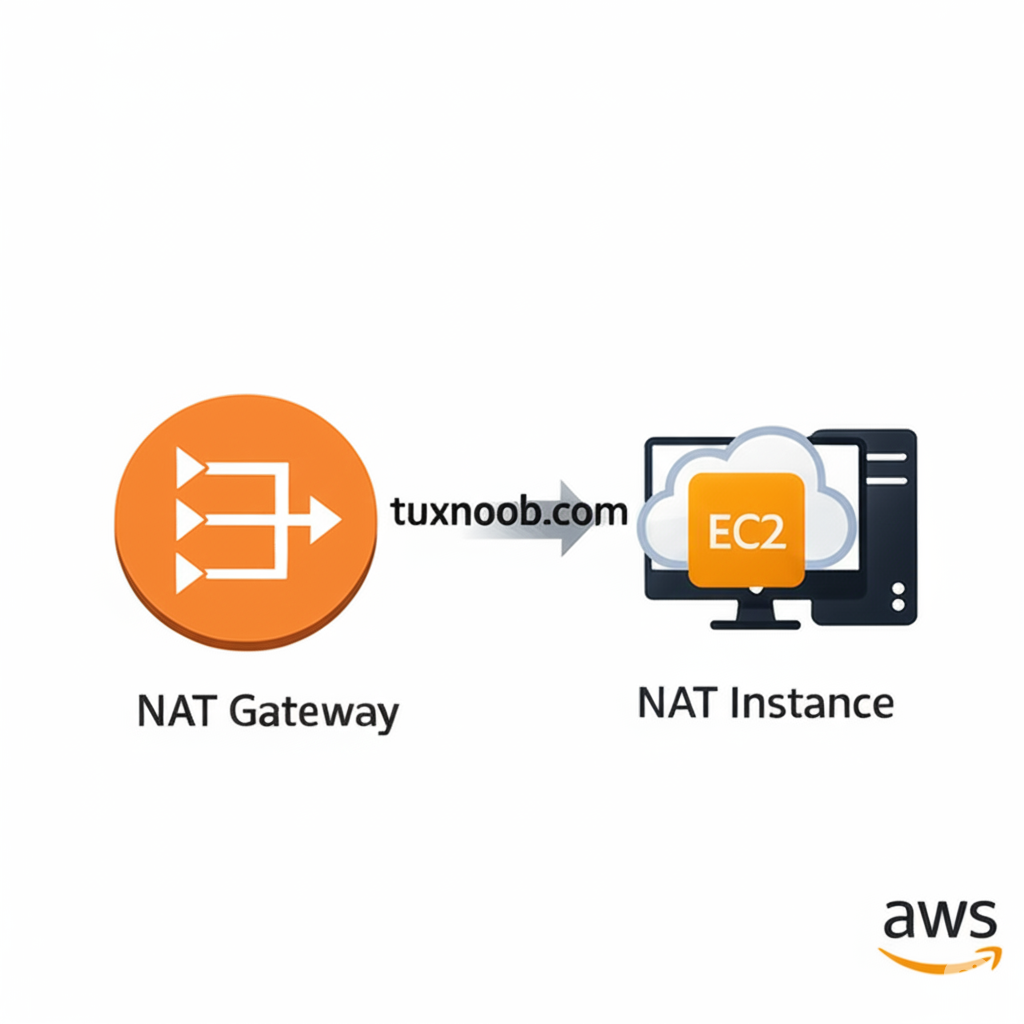
Image by Arief JR
An AWS Virtual Private Cloud (VPC) is your own private, isolated section of the AWS cloud. For anyone familiar with IT infrastructure, this virtual network closely resembles a traditional network that you’d operate in your own data center, with the added benefits of using the scalable infrastructure of AWS.
Essentially, a VPC provides the logical foundation to deploy your resources while giving you complete control over your virtual networking environment. You can select your own IP address ranges, create subnets, and configure route tables and network gateways—just like you would on-premises, but without the need for physical hardware. This unique combination offers the familiarity of traditional networking with the unparalleled power, scalability, and cost-efficiency of the cloud.
After your setting the VPC, the resource under VPC can’t get the internet access from private. So it will need NAT Gateway that can accessing the internet from private resource. With AWS NAT Gateway, setup is as simple as a few clicks, adding a route, and letting it run. However, behind this convenience lies a pricing model that charges you per hour plus a fee for every gigabyte of data processed. For applications with low traffic, smaller use cases, or especially in development and testing environments, these costs can silently and significantly contribute to a higher AWS bill.
A lesser-known alternative is the NAT Instance. This solution uses a standard EC2 instance to provide internet access for your private subnets, offering a more predictable and often cheaper pricing structure.
Below this comparation table NAT Gateway with NAT Instance:
| Feature | AWS NAT Gateway | AWS NAT Instance |
|---|---|---|
| 👨💼 Management | Fully Managed by AWS. No user maintenance, patching, or administration required. | Self-Managed. You are responsible for launching, patching, and maintaining the EC2 instance. |
| 📈 Availability | Highly Available within an AZ. Redundant by design. For cross-AZ redundancy, you deploy one NAT Gateway per AZ. | Single Point of Failure by default. You must manually engineer high availability using scripts, Auto Scaling Groups, etc. |
| 🚀 Bandwidth | High & Auto-Scaling. Scales automatically from 5 Gbps up to 100 Gbps. | Limited by EC2 Instance Type. Bandwidth is dependent on the size and family of the EC2 instance you choose (e.g., t3.micro vs. m5.large). |
| 💰 Pricing Model | Hourly Rate + Data Processing Fee. You are charged per hour the gateway is active AND per GB of data that passes through it. | EC2 Instance Cost. You are charged for the hourly EC2 instance run time plus standard data egress fees. No data processing fee. |
| 🛡️ Security | Managed by AWS. You cannot associate a Security Group directly. Security is controlled via NACLs and the Security Groups of your resources. | User-Controlled. You must attach and configure Security Groups. You are responsible for all OS-level security patching. |
| 🛠️ Maintenance | Zero Maintenance. AWS handles everything behind the scenes. | Ongoing Maintenance. Requires regular OS patching, security updates, and monitoring of the EC2 instance. |
| ⏱️ Ease of Setup | Very Simple. Can be created and configured in minutes through the console with a few clicks. | More Complex. Requires launching and configuring an EC2 instance, disabling Source/Destination Check, and configuring routing. |
| ✅ Ideal Use Case | Enterprise applications, production workloads, and any scenario where high availability and low operational overhead are critical. | Dev/test environments, cost-sensitive startups, and low-traffic applications where you are comfortable managing the infrastructure. |
Simulation Cost
Let’s assume outbound traffic around 200GB/monthly and only have 1 NAT Gateway and NAT Instance:
| NAT Gateway | NAT Instance (t4g.nano) |
|---|---|
| NAT Gateway Usage: 43.07 USD/Monthly | EC2 Usage: 3.7 USD/Monthly |
| NAT Gateway Data Transfer: 200 X 0.059 USD = 11.8 USD/Monthly | EC2 Data Transfer: 200 X 0.13 USD = 26 USD/Monthly |
| Total: 54.87 USD/Monthly | Total: 29.7 USD/Monthly |
You’re saving around 54%, just changing 1 component.
Implementation of NAT Instance
For implementation NAT Instance, in here i will use terraform to provisioning EC2 instance with instance type t4g.nano. Don’t forget place the EC2 instance in public subnet. Below the terraform to provisioning NAT Instance:
1
2
3
4
5
6
7
8
9
10
11
12
13
14
15
16
17
18
19
20
21
22
23
24
25
26
27
28
29
30
31
32
33
34
35
36
37
38
39
40
41
42
43
44
45
46
47
48
49
50
51
52
53
54
55
56
57
58
59
60
61
62
63
64
65
66
67
68
69
70
71
72
73
74
75
76
77
78
79
80
81
82
83
84
85
86
87
88
89
90
91
92
93
94
95
96
97
98
99
100
101
102
103
104
105
106
107
108
109
110
111
112
113
114
115
116
117
118
119
120
121
122
123
124
125
126
127
128
129
130
131
132
133
134
135
136
137
138
139
140
141
142
143
144
145
146
147
148
149
150
151
152
153
154
155
156
157
158
159
160
161
162
163
164
165
166
167
168
169
170
171
172
173
174
175
176
177
178
data "aws_availability_zones" "available" {}

terraform {
  backend "s3" {
    encrypt                 = true
    bucket                  = "terraform-tuxnoob"
    region                  = "ap-southeast-3"
    key                     = "terraform-tuxnoob/Infra/AWS-EC2/nat-instance/terraform.tfstate"
    profile                 = "default"
    shared_credentials_file = "~/.aws/credentials"
    role_arn                = "arn:aws:iam::XXXXXXXX:role/Tuxnoob"
  }
}

locals {
  subnet_id = ["subnet-XXXXXXXXXXX"]
  profile   = "default"
  region    = "ap-southeast-3"
  ec2-name = "Tuxnoob-nat-infra"
  sg-name = "Tuxnoob-nat-infra-SG"
  tags = {
    Environment  = "Tuxnoob Infra"
    Env          = "Infra"
    Type         = "nat"
    Organization = "tuxnoob.com"
    ManagedBy    = "terraform"
    Terraform    = true
  }

}

###############################################################################
###############################################################################
###############################################################################

#Provider AWS
provider "aws" {
  shared_credentials_files = ["~/.aws/credentials"]
  profile                  = local.profile
  region                   = local.region
}

#AWS Key Name
resource "aws_key_pair" "tuxnoob" {
  key_name   = "tuxnoob-nat"
  public_key = file("~/.ssh/tuxnoob.pub")
}

#AWS EC2
module "ec2_nat" {
  source                      = "../modules/aws-ec2-simple/"
  count                       = 1
  name                        = "${local.ec2-name}-${trimprefix(data.aws_availability_zones.available.names[count.index], "ap-southeast-")}"
  ami                         = "ami-xxxxxxx"
  instance_type               = "t4g.nano"
  key_name                    = aws_key_pair.tuxnoob.id
  vpc_security_group_ids      = aws_security_group.tuxnoob-nat-sg[*].id
  subnet_id                   = ["${local.subnet_id[count.index]}"]

  root_block_device = [
    {
      device_name = "/dev/sda1"
      volume_size = 10
      volume_type = "gp3"
    }
  ]

  tags = merge({ "Name" = "${local.ec2-name}-${trimprefix(data.aws_availability_zones.available.names[count.index], "ap-southeast-")}" }, local.tags)
}

# Security Group Creation
resource "aws_security_group" "tuxnoob-nat-sg" {
  count  = 1
  name   = "${local.sg-name}-${trimprefix(data.aws_availability_zones.available.names[count.index], "ap-southeast-")}"
  vpc_id = "vpc-XXXXXXX"

  tags = merge({ "Name" = "${local.sg-name}-${trimprefix(data.aws_availability_zones.available.names[count.index], "ap-southeast-")}" }, local.tags)
}

# Ingress Security Port 22
resource "aws_security_group_rule" "ssh_inbound_access" {
  count             = 1
  description       = "allow for ssh access"
  from_port         = 22
  protocol          = "tcp"
  security_group_id = element(aws_security_group.tuxnoob-nat-sg.*.id, count.index)
  to_port           = 22
  type              = "ingress"
  cidr_blocks       = ["10.12.0.0/16"]
}

resource "aws_security_group_rule" "nat_inbound_access" {
  count             = 1
  description       = "allow all port for nat instance"
  from_port         = 0
  protocol          = "-1"
  security_group_id = element(aws_security_group.tuxnoob-nat-sg.*.id, count.index)
  to_port           = 0
  type              = "ingress"
  cidr_blocks       = ["0.0.0.0/0"]
}

# All OutBound Access
resource "aws_security_group_rule" "all_outbound_access" {
  count             = 1
  from_port         = 0
  protocol          = "-1"
  security_group_id = element(aws_security_group.tuxnoob-nat-sg.*.id, count.index)
  to_port           = 0
  type              = "egress"
  cidr_blocks       = ["0.0.0.0/0"]
}

# Output EC2 Instance
output "key_name" {
  value       = aws_key_pair.tuxnoob
  description = "Name of key pair RSA"
}

output "region" {
  description = "AWS region."
  value       = local.region
}

output "profile" {
  description = "AWS profile."
  value       = local.profile
}

output "security_group" {
  value       = aws_security_group.tuxnoob-nat-sg[*].id
  description = "Id of security group"
}

output "ec2_instance_id" {
  description = "The ID of the instance"
  value       = module.ec2_nat[*].id
}

output "ec2_instance_arn" {
  description = "The ARN of the instance"
  value       = module.ec2_nat[*].arn
}

output "ec2_instance_capacity_reservation_specification" {
  description = "Capacity reservation specification of the instance"
  value       = module.ec2_nat[*].capacity_reservation_specification
}

output "ec2_instance_instance_state" {
  description = "The state of the instance. One of: `pending`, `running`, `shutting-down`, `terminated`, `stopping`, `stopped`"
  value       = module.ec2_nat[*].instance_state
}

output "ec2_instance_primary_network_interface_id" {
  description = "The ID of the instance's primary network interface"
  value       = module.ec2_nat[*].primary_network_interface_id
}

output "ec2_instance_private_dns" {
  description = "The private DNS name assigned to the instance. Can only be used inside the Amazon EC2, and only available if you've enabled DNS hostnames for your VPC"
  value       = module.ec2_nat[*].private_dns
}

output "ec2_instance_public_dns" {
  description = "The public DNS name assigned to the instance. For EC2-VPC, this is only available if you've enabled DNS hostnames for your VPC"
  value       = module.ec2_nat[*].public_dns
}

output "ec2_instance_public_ip" {
  description = "The public IP address assigned to the instance, if applicable. NOTE: If you are using an aws_eip with your instance, you should refer to the EIP's address directly and not use `public_ip` as this field will change after the EIP is attached"
  value       = module.ec2_nat[*].public_ip
}

output "ec2_instance_tags_all" {
  description = "A map of tags assigned to the resource, including those inherited from the provider default_tags configuration block"
  value       = module.ec2_nat[*].tags_all
}
Disable Source/Destination check, just only check in stop like below screenshot:

After provisioning the EC2 instance, connect to instance using ssh access. Then run the command:
1
2
~# echo 1 > /proc/sys/net/ipv4/ip_forward
~# iptables -t nat -A POSTROUTING -o ens5 -j MASQUERADE
Update Terraform script VPC to change NAT Gateway to NAT Instance
Before i use terraform to create the VPC in AWS, so i just remove or uncomment the line related provisioning the NAT Gateway and leave it the elastic ip address. Because i will attached the existing elastic ip address into NAT Instance. In here i use terraform, the several terraform script look like this:
1
2
3
4
5
6
7
8
9
10
11
12
13
14
15
16
17
18
19
20
21
22
23
24
25
26
27
28
29
30
31
32
33
34
35
# Create Internet Gateway
resource "aws_internet_gateway" "igw" {
  vpc_id = "${aws_vpc.main.id}"

  tags = {
    Name = local.igw-name
    Environment = local.environment
    Organization = local.organization
    Env = local.env
  }
}

resource "aws_eip" "tuxnoob-production-subnet-eip" {
  count = (var.subnet_count == true ? 3 : 1)
  domain = "vpc"
  tags = {
  Name = "Tuxnoob Production-${trimprefix(data.aws_availability_zones.available.names[count.index], "ap-southeast-")}"
  Environment = local.environment
  Organization = local.organization
  Env = local.env
}
  }

# resource "aws_nat_gateway" "nat-gateway-tuxnoob" {
#   count = (var.subnet_count == true ? 3 : 1)
#   allocation_id = "${aws_eip.tuxnoob-production-subnet-eip.*.id[count.index]}"
#   subnet_id     = "${aws_subnet.public_subnet.*.id[count.index]}"
#   tags = {
#   Name = "Tuxnoob Production-${trimprefix(data.aws_availability_zones.available.names[count.index], "ap-southeast-")}"
#   Environment = local.environment
#   Organization = local.organization
#   Env = local.env
#   Terraform = "true"
# }
# }
And update the route table like this:
1
2
3
4
5
6
7
8
9
10
11
12
13
14
15
16
17
18
19
20
21
22
23
24
resource "aws_route_table" "private_route" {
  vpc_id = "${aws_vpc.main.id}"
  count = (var.subnet_count == true ? 3 : 2)

  route {
      cidr_block = var.cidr_block
      ###comment tha value `nat_gateway_id` and change to `network_interface_id` in below
      # nat_gateway_id = aws_nat_gateway.nat-gateway-tuxnoob[0].id
      network_interface_id = "eni-xxxxxxxx" # The eni will showing after you provisoning the EC2 instance
  }

  route {
      cidr_block = "172.16.0.0/16"
      vpc_peering_connection_id = "pcx-XXXXXXX"
    }

  tags = {
    Name = "Tuxnnob-Private-Route-DevStaging-${trimprefix(data.aws_availability_zones.available.names[count.index], "ap-southeast-")}"
    Environment = local.environment
    organization = local.organization
    env = local.env
    Terraform = "true"
  }
}
Conclusion: Making the Right Choice for Your Workload
Ultimately, the choice between a NAT Gateway and a NAT Instance is a classic trade-off between convenience and cost.
NAT Gateway offers a practical, “set-it-and-forget-it” solution, but this convenience can lead to unnecessarily high costs over the long term if your traffic patterns don’t justify the expense. For low-traffic applications or non-production environments, a NAT Instance emerges as a powerful, cost-effective alternative, requiring only a modest amount of additional manual effort during setup.
To make an informed decision, follow these final steps:
Analyze Your Traffic: Begin by measuring your average and peak outbound traffic volume.
Model the Costs: Use your traffic data to compare the projected monthly costs of both a NAT Gateway (hourly + data processing fees) and a NAT Instance (EC2 instance cost).
Decide and Migrate: If the cost savings with a NAT Instance are significant, you have a clear business case for making the switch.
A Critical Note for Production Environments: If you plan to leverage the cost savings of a NAT Instance for production workloads, do not compromise on reliability. It is essential to implement robust auto-recovery scripts and deploy your instances across at least two different Availability Zones to build a high-availability architecture that can withstand instance failures.
– Thanks –